Showing posts with label Cosplay. Show all posts

Wednesday, 22 August 2012

Prop Making 101: Cosplay Prop Making for Beginners Part 2

Welcome back to my two part series of posts on cosplay prop making! Last week we covered planning and making props using a prop katana as an example. This week we'll look at a few more construction tips and go into spraying and finishing.

Foam is Your Friend

We left the katana project with the basic build finished on the blade but there is one major part of the sword left to finish: the hilt. The main challenge here is that the hilt and pommel of a sword is usually curved at the edges and while plasticard and doubled up dowel are strong they are not flexible. It is at this point we must call on another trusty friend of the prop maker: craft foam. Craft foam is a medium to high density flexible foam that comes in a variety of colours, usually as A4 sheets. You can find it at basically any arts and craft store, often brand named as funky foam or something similar. The main reasons I use craft foam are its flexibility, thickness and affordabilty. You can also cut it very easily with a stanley knife or scissors.

Craft foam works best when layered with plasticard (via the use of hot glue) as it forms a durable, solid multilayered compound which is strong and light:
Above we see this effect on the cross piece that connects the katana grip to the blade. All 7 layers have been cut from the same template and although there is some deviation this step is followed by hot gluing a strip of plasticard to each exposed side of the layers to hide the messiness.

Craft foam also helps plasticard bend. When dealing with a part of a prop where a curved edge is required it is best to use lower thickness plasticard; preferably 0.5mm or less as it is more flexible. As foam is much more flexible than styrene sheet and holds hot glue very well it forms the perfect basis for curved parts of a prop:
This picture shows what will become the pommel of the katana (notice the crosspiece out of focus in the background. The hilt itself is made from cut up sections of electrical trunking flanked by pieces of dowel and taped together at either end:
The foam has been stuck to this core piece via the gradual application of hot glue. It was stuck in place at the centre of the trunking then more drawn out lines of glue were added as the core was rolled along a flat surface, forcing each line of glue into a uniform layer. This curved layer of foam then formed the base to which 0.5 mm thick plasticard can be stuck. You are probably now asking "why not just leave the foam without going to all the trouble of adding the plasticard?" It's a valid question and it has a valid answer; foam does not hold paint well at all and it has very little structural strength. Never paint directly onto foam. It will just rub off, even if you prime it. If your foam is the right color to begin with however - as was the case with the grip of the katana - there is no need for the addition of a layer plasticard. It was however added to the bottom of the grip to seal and hide the messy end shown above.

Mind the Gap

Once all of the structural parts of your prop are done all thats left to do before painting is filling in any gaps that may have opened during construction as parts of it flexed or pulled apart in odd ways. Usually these are small and won't threaten the structural integrity of the piece but they do look a bit rubbish if left unfilled. To deal with these we use modelling putty. It goes by many names; kneadite, green stuff, white stuff, grey stuff etc. It's essentially a form of epoxy putty that comes in two different coloured components (often blue and yellow) that when mixed form a shapeable putty that sticks to anything dry and gradually solidifies over about 12 hours. You can buy it at basically any model store (games workshop included if you like paying stupid amounts of money for very little) and it's great for filling gaps. Just mix it up, spread it into any gap with a wetted finger or the edge of your hobby knife:
Then leave it over night and sand the area with fine or very fine grade sand paper:
At this point you're almost ready to paint the prop, just make sure there are no stringy bits of hot glue left on it that will ruin the finish; you may even want to give the whole thing a sand with fine grade sandpaper to remove debris and prepare the surface for paint.

Spray and Pray

Once all your gaps are filled it's time for spraying! Always remember to undercoat your prop with a black or grey primer before any other colours go on (I personally use Games Workshop chaos black spray but thats possibly because I used to work for the company and old habits die hard) then go nuts with whatever spray you want to use. Just remember that your not trying to paint the whole thing in one go, some spray paints (especially enamel metalics) work best if applied in thin layers with 30min to 1 hour of drying between coats. Also when using masking tape always cover whatever your protecting completely in masking. Spray paint gets everywhere.

If you need to stencil anything I reccomend using decal paper; essentially an entire sheet of sticky back plastic that you can draw on. Its easy to get hold of and is great because you can use your original templates to mark out an exact replica of the prop-face you are stencilling onto:
here we see the original templates of the katana, the sprayed blade and the decal paper that will be used to mask off the blade when the final light sliver spray layer is added. Here's the finished effect:

Closing Thoughts

Phew! We're done! the prop is finished, sprayed and ready to take to a convention! Or is it. Remeber to make sure you can't actually hurt someone with your prop before you take it to a con or it's probably just going to get taken off you. Smooth off and blunt any sharp edges or points and make it as light weight as possible. We don't want anyone getting hurt especially yourself. Mixing alcohol and samurai swords may sound fun,  but someones probably going to loose an arm.
PARTY FOUL!

Also one last tip. Remember that everyone will think your props look cooler than you think they are, while all you may see are the flaws and inaccuracies that occurred while you were rushing to finish things all everyone else will see is a bad ass costume. You've had to be in contact with the thing for hours of blood sweat and tears; everyone else will see it for 5 minutes tops. So don't worry about things not being good enough. Go out and make cool things!

Stay Crunchy Internet

Wednesday, 15 August 2012

Prop Making 101: Cosplay Prop Making for Beginners Part 1

First of all apologies for the lack of posting last week, I've been feverishly making props for Amecon 2012 which I attended this weekend just gone. Needless to say it was ace and I had a great time. I also ran a small event which to my surprise saw massive attendance with what appeared to be over 100 people turning up (I was later informed it was closer to 70). I'd like to thank everyone who came to see me say things and make bad jokes for about an hour. What follows is an expanded version of my presentation including links to where I source my material and some extra hints and tips for anyone who's wanted to make cool stuff before but didn't know where to start.

I've been making costume props for between 4 and 5 years now because its fun, larger and more craft based than fiddly little models and the ladies love it (one of these statements may or may not be true). I always feel more like I'm actually making something with props than I do with Warhammer or ridiculously pricy Japanese fighting robot kits and it is this distinctly pleasurable sensation that keeps me coming back to the hobby. Here are some of the more recent fruits of my labour:

As you can see I've made a few  bits and pieces over the years; I've made my fair share of mistakes, burned, cut, sanded and drilled myself more times than I can count (I would not for example recommend impaling your finger with a hobby drill, it hurts alot) and spent many a sleepless night desperately trying to finish off things that I've left to late. I have learned from these experiences and intend to help you avoid them.

Tools of the Trade

Here are the tools I most frequently use when making props:

  1. A Stanley knife for cutting craft materials.
  2. A hot glue gun for sticking things together. It's important to note that hot glue is very hot and will burn you. Remember often less is more and excess glue can cause tiny spider web strands to form on and around your prop which are a total pain.
  3. An engineer's rule for measuring and a number of other things. These are indespensable as they are accurate, strong and hot glue does not stick to them very well. This meanst that you can use your rule to spread out hot glue without risking burns.
  4. A mechanical pencil with 0.5 or 0.7mm diameter graphite leads. These are great because pencil rubs off easily to remove mistakes and they have a set lead width unlike standard sharpened pencils which assures consistant accuracy.


Having a Plan

One of the most important parts of making props is planning, never before has the old adage "measure twice cut once" been more apt than here. If you want to research a particular character's weapon it's worth trying to find out if it's based on an actual piece of period weaponry. Wikipedia is great for this kind of thing. Also search websites like Cosplay Island and see if you can crib some notes off of people who may have tried to make that particular prop before. The Gibson Les Paul pictured above is based on a cutting guide I printed off the internet after googling around for literally 10 minutes.

Another great source of inspiration for prop measurements is action figures. If you can get your hands on a reasonably well scaled figure version of the character you want to cosplay there is a simple trick you can use to work out all the measurements you need for your prop. All you have to do is divide your height by the height of the action figure (both in cm) and that gives you a scaling ratio. You can then multiply the dimentions of any prop that comes with said figure by that ratio to scale it up to your size. For example for the cosplay to the right I based the gun and the breasplate design on scaled up versions of the action figure to the left with moderate success.

If no action figures or easily printable templates are forthcoming fear not! Just grab a pen and some scrap paper and scribble out some rough sketches/ diagrams of the item you want to make and try to build up in your head how it's going to fit together. How will you strengthen it? where might it flex? which parts of it might need extra support. These aren't meant to be detailed schematics so just let loose and get some rough measurements down.

Template: Response

The next stage on from roughly sketching out/ drawing your prop is scaling it up as a rough draft. The easiest and cheapest way to do this is using templates made out of thin cardboard, about the same thickness as a birthday card. You can buy this in sheets online but I have always made mine out of old cereal boxes, dividers on the inside of packaging and just about anything else I can get my hands on. Once again these templates are intended to help you get an idea for how your prop is going to fit together. Card is cheap and easy to find so its easy to go though plenty of revisions.

Use your sketches, an engineer's rule and a mechanical pencil to sketch a rough 2D version of all or part of your prop then cut it out. You can even attach various parts together with tape to make a full 3D draft of the piece. Don't expect to get things right first time; template drafting is supposed to be a gradual, creative process and making mistakes are all part of the development of your prop.

Making it

So now you've got templates made for all the parts of your prop and your ready to make it. For example lets say your making a samurai sword like I did last week. you know roughly what it looks like from the anime:
You've researched it and discovered that Katanas are always at least 60cm long and that the blade should extend into the hilt to balance and strengthen it. You've also seen that the blade you want to make (based on one of Mifune's from Soul Eater) is only slightly curved. You've also made 4 templates, one of which is just the right curvature. All you need is a strong but light construction material. The best thing to use for straight, flat props like swords and guns is Styrene sheet  (AKA plasticard) which I buy from Station Road Baseboards, a UK based company which usually delivers very fast. 1mm to 0.7mm thick is what I tend to use unless it needs to bend around something.

Start by bluetacking your template to the plasticard and drawing around it, if your template is too long for the plastic just tape two pieces together:
 then carefully cut around the outline with your stanley knife:
these two pieces make up the two halves of your sword (this approach works well for any single edged blade). The line drawn down them indicates where the cutting edge of the blade starts. Now we need some 0.6cm dowel which you can buy from any high street DIY store. The dowel is used to form a backbone for the sword. It's too flexible as a single rod but the magic of physics results in a massive increase in strength and sturdyness once two dowels are taped together by wrapping them in selotape. Now hot glue the dowel backbone close to the back of the blade (but not right on its back edge)
You'll notice that the backbone is not one continuous piece of doubled up dowel and it does not extend to the tip of the plasticard, this helps it conform to the curve of the blade and allows it to form a sharp looking tip. The blade is also gaffer taped together along the first 15cm to prevent the two halves from connecting unevenly. Now score but don't cut along the second line on the outside of the blade. This will allow the plasticard to flex where the cutting edge starts, creating a realistic looking diagonal that gradually sweeps into the point.
once scored, simply wrap the unglued side of the blade around onto the dowel and (once you're sure both sides line up) glue it in place along the backbone. Then to seal the cutting edge of the blade apply hot glue liberally on the inside of the sword and spread it along one side edge where the two diagonal pieces meet with the flat end of your engineer's rule in sections; holding the outside of the blade till you feel it cool as you go. Finally glue the tips of the sections together and back the blade with a thin strip of plasticard; you can use a 0.8cm strip and cut off the excess from the pointy end using your stanley knife.

So that covers making the blade. Next week we'll go into making the hilt,cover some finishing tips and talk about spray painting and decal paper. Also: how to make your props convention safe.

Stay Crunchy Internet

Wednesday, 14 March 2012

The Ascent of Nerd

As I mentioned in my first post I am what I like to call a "Person of Alternative Interests" after I've been drinking. When I'm sober I'll accept nerd, geek, weirdo or "hey you with the glasses come help me fix my computer" - which I can totally do (ladies) - a moniker I have earned via long hard years spent in the weeaboo trenches of various societies, conventions and internets. After much reflection on my life so far I've decided I may actually have my parents to blame. For example the only night we were allowed to have dinner in front of the TV when I was a child was Wednesday night because that was when Star Trek: The Next Generation was on.
Pictured: what I (still) want to be when I grow up
Also at some point between the ages of 12 and 13 my dad sat me down for an important man to man discussion. The kind of talk that all good fathers have with their almost teenage sons. That talk was about Star Wars and how we should watch it together.
More important than sex ed
A lot has happened since then but the geek in me has never gone away, in fact he's grown into something new, something eccentric and something sexy. He moves in exclusive circles, speaks a myriad different languages and inhabits a world that many people don't even know exist.

We live in a society where enforced social norms and compromise crush the life from our lungs and the colour from our souls, where apathy and futile acceptance force us to build gilded cages from the stuff we accumulate in which we are imprisoned until death. Where fiscal responsibility and creative photosynthesis force us to root ourselves to stagnant sinking soil made from endlessly recycled celebrity and hollow pop culture.  This is a world that I decided a long time ago not to inhabit so I made a big life choice:
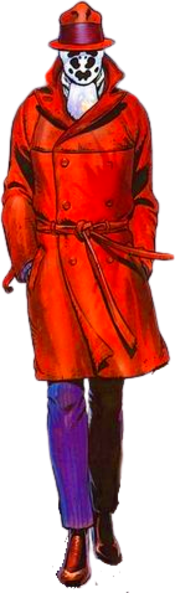
I joined an anime (Japanese cartoon) appreciation society. The group of people I found there was one of the most creative, welcoming and fun social groups I have ever had the pleasure to be a part of, we all had issues (some of us even monologued like self indulgent Rorschach wannabes) but everyone was welcome and united by one passion. We drank, we watched anime, we argued, we fought, we laughed, we partied, we philosophised and had elbowy awkward sex until the early hours of every Friday night. I met a girl, fell in love and became a man in the company of these amazing crazy people.
Some of which were also anthropomorphic animals
Towards the end of my university years I moved in with four physics and philosophy students who were all kinds of amazing, we played through Mass Effect 1 and 2 together along with Assassin's Creed and formed probably the worst 5 man team DotA has ever seen. I had some of the best friendship times ever in that house with those guys (no homo).

After university one of the first jobs I got was at the headquarters of Games Workshop "Warhammer World" essentially a combination of the virgin sweat boxes you see on most high streets, an epic gaming hall a museum and a bar.
It sure as hell beat Starbucks as a graduate job

In this hobby stronghold I got the opportunity to teach kids to paint, make friends and kick ass at table top role playing games, just like I did when I was little.
Here I am, kicking ass... apparently
I also got to hang out with some pretty cool dudes and manage other smaller GW stores across England. Those were magic times.

Then of course there's the conventions:
Cosplay Hard

Party Harder


So what's the point of this self indulgent look back at the past? The point is I'm not the only one who's grown up as a nerd, we're everywhere hidden in plain sight. We've done it all, probably better than you have and we've lived to tell the tale. We're not all reclusive misanthropic loosers who sit in our bedrooms alone, we're out there stealing your girlfriends and living it large and we're not scared any more. We've grown up, we know what we're doing now and we're not going to take your shit any more. So next time you see someone like this:
Remember underneath all that apparent awkwardness he's dropping sick ass beats like this:
And you will never be as cool as he is.

Stay Crunchy Internet